2 Star Kayaking
We are on the road everyday. Where ever we go, we either ride, drive, or walk around. Now, we're gearing up again for an exciting sport and means of transport. Well of course we can't travel around Singapore with a kayak; actually in a recent flood case, some guy with a foldable kayak emerged in the center of Orchard Road. Well sleek and cool huh? :)
So here we are again, this time taking up the 2 star course. The novelty here is the ability to move about in the water, rather than the usual land transport.
So here we are again, this time taking up the 2 star course. The novelty here is the ability to move about in the water, rather than the usual land transport.
|
|
In this course, we learnt the following:Theory:
0) differentiating a kayak and a canoe 1) Understanding tides and checking tide tables 2) Water currents Revision: 1) Paddling forward, backward in a relatively straight line. 2) Right and Left sweeping strokes. 3) J and Classic draw 4) Stern Rudder Practical: 1) Right way of lifting and putting down a kayak single handed. 2) Proper capsize with spray skirt 3) Eskimo Bow rescue 4) Sculling draw 5) Low brace recovery 6) Low brace turn 7) High brace recovery 8) Edging vs leaning 9) Edge row, J draw, classic draw, sculling draw 10) Kayak to swimmer rescue (bow and stern rescue) 11) TX rescue (refer to 1star kayaking) 12) Bow rudder 13) Stern Rudder |
Click here for theory lesson
|
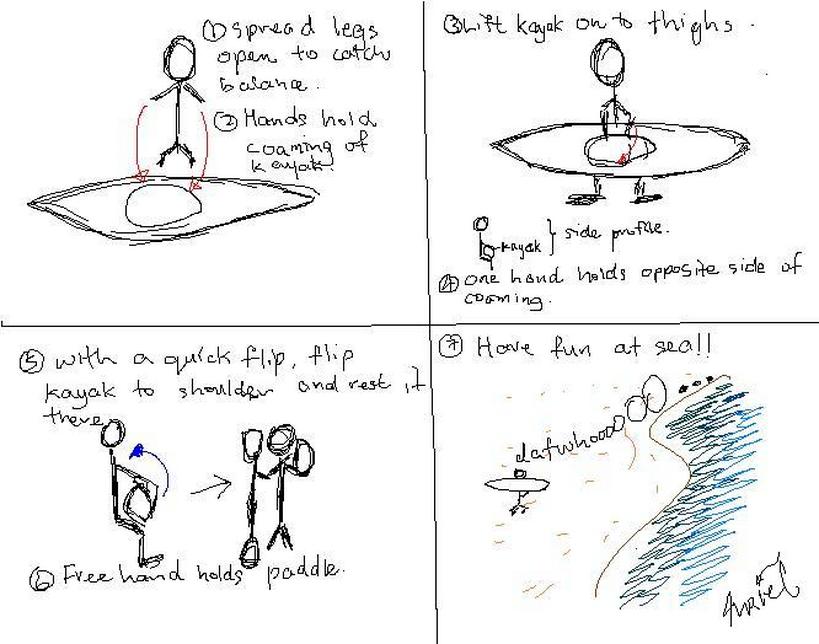
The right method to lift a kayak
Capsizing with spray skirt
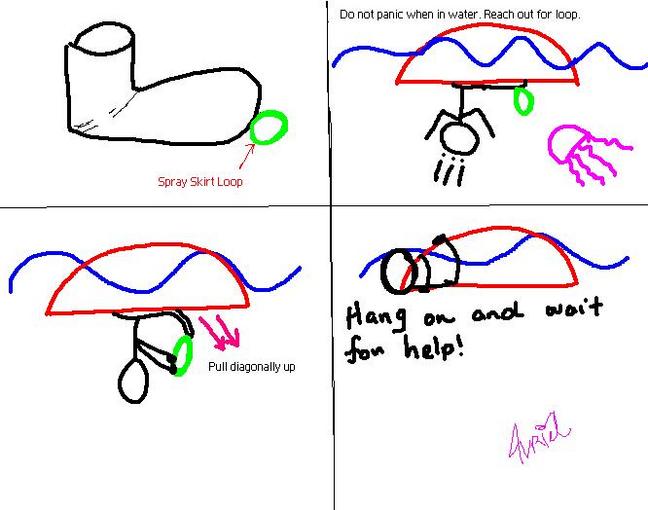
Every spray skirt should have a handle at the front for the kayaker to pull when he capsizes. The capsize drill is similar as taught in 1star kayaking course. The only difference is that this time, when one capsizes, he is to pull the loop at the front of the spray skirt. The loop is to be pulled diagonally upwards (taking the kayaker's position as upright) in the direction towards the bow of the kayak. This will automatically release the "catch" of the spray skirt around the coaming of the cockpit. The kayaker can then push himself out of the cockpit and continue to the bow of the kayak to wait for a rescuer.
Eskimo Bow rescue
The eskimo bow rescue looks really cool especially if you see some one do it. What is it used for? I can only think of one main reason for it. It's used when you're feeling hot and want to take a short dip in the water, and you do not know how to do the eskimo roll (see 3 star).
The reason why this rescue is impractical to use in dire situations is because you will be in the water not knowing if someone will actually spot you, while holding your breath and waiting to be rescued. Well if someone is near by and sees you, then good. If no one is near by and no one sees you, then God bless...
The reason why this rescue is impractical to use in dire situations is because you will be in the water not knowing if someone will actually spot you, while holding your breath and waiting to be rescued. Well if someone is near by and sees you, then good. If no one is near by and no one sees you, then God bless...
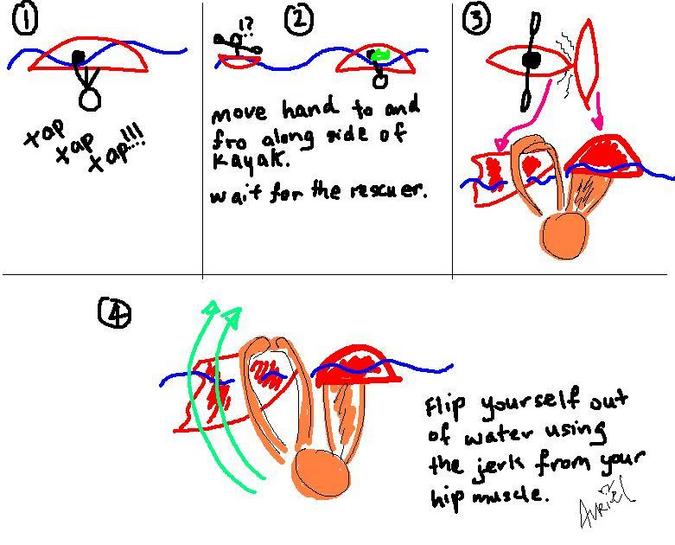
You start of doing the same capsize drill as covered in 1 star kayaking course. Tap the kayak 3 times but this time you do not come out of the kayak. The spray skirt keeps the kayak dry. Move your hands to and fro the sides of the kayak (see 2) and wait for your rescuer to spot you.
When the rescuer spots you, he will come towards you and align himself perpendicular to your kayak (imagine your face turning purple now, if this was in a real rescue scenario and your rescuer was 20 meters away from you, and the water is choppy and tough). When you feel the knock on our kayak, you continue to move your hands to and fro until you feel your rescuer's kayak. Move both your hands to hold on to the bow of your rescuer's kayak. Pull yourself up towards the bow and allow your head to lie on the bow.
Use your hip to cause a sudden jerk, making the kayak flip upwards. Lift your head up and you're ready to go (:
Sculling draw
There are two ways of doing the sculling draw. Method 'A' is taught by Caleb from 'water venture' while method 'B' is taught by Kevin Lim from 'NUS'.
Both methods are able to do the draw, however, my favorite method is method 'B'. This is because there is a more advanced method, called 'Sculling for support', in which method 'A' is not effective in doing (leads to high capsize rate). Method 'B' however, is able to handle both drawing left and right, and doing the sculling for support.
Another benefit of method 'B' is that it is very easy, during tough water conditions, to control the draw of the kayak, compared to method 'A'. While method 'A' only pushes water during its vertical strokes (refer figure below 'a' and 'c' are called vertical strokes), method B has full control of the sculling draw. M1, m2, m3, and m4 are all in the process of pushing water.
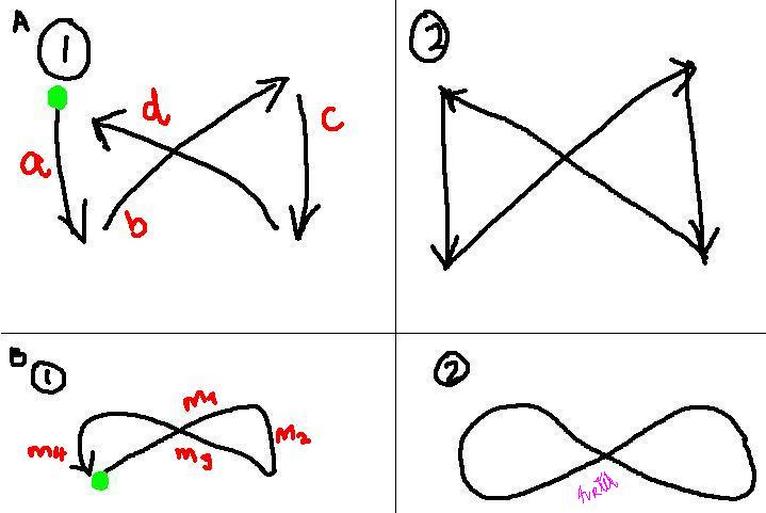
Method 'A': Starting from the green dot, move the paddle vertical towards your kayak. Just before it reaches your kayak, turn your wrist such that the paddle is able to CUT vertically as shown in step b. Once you have cut to a point past your torso, you turn your wrist again such that the power face of the paddle is facing the kayak again. Pull the paddle vertically towards your kayak again as in step c. Finally, turn your wrist again such that it is able to cut the water as in step d. Repeat the whole process to get the sculling draw.
Method 'B': This method is performed in an entirely smooth move. Starting from the green dot, move the paddle in a slight diagonal stroke pushing a bit of water towards your kayak as you would in a sweep, but this time just a little (meaning your power face shouldn't be facing the stern of your kayak, but slanted towards the stern of your kayak.) Once you reach past your torso, you pull the paddle towards the kayak slightly diagonal (as opposed to method 'A' which pulls the paddle vertically perpendicular to the kayak.) when the paddle is close to your kayak, turn your wrist such that the paddle is once again diagonal towards the bow of the kayak. Allow the paddle to "cut" the water towards the bow of the kayak, while pushing some water towards the front of the kayak. On reaching the front of the kayak, pull the paddle towards the kayak again. Repeat the steps to get a sculling draw.
The end result of method 'A' is an inverted triangle as seen in method 'A' 2. Method 'B' ends looking like an infinite sign in math.
Low Brace Recovery
Recoveries are used to prevent capsize. Hmmm... Pretty easy you may think. The problem is getting used to it. I was once about to capsize having made a sudden turn. That split few seconds before i capsized, my mind was in a tangle whether to use the high brace support (explained later), low brace support, or neither. Before i could decide, i was in the water greeting the fishes.
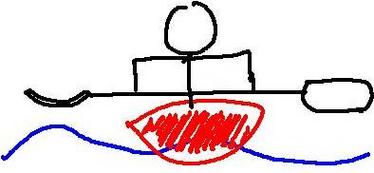
The low brace recovery is used when the kayak is about to capsize slightly. This basically means when the kayak is slightly tilted to the side. This is as compared to the high brace support which is meant to prevent capsize when the kayak is seriously leaning on one side and going to tilt over any moment.
The low brace recovery is used when the kayak is about to capsize slightly. This basically means when the kayak is slightly tilted to the side. This is as compared to the high brace support which is meant to prevent capsize when the kayak is seriously leaning on one side and going to tilt over any moment.
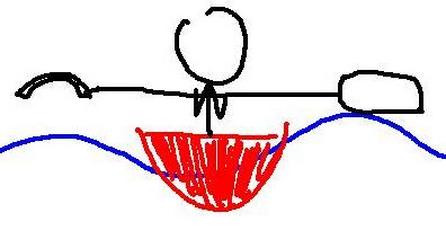
The low brace support works by squaring your arms to your body as shown in the picture. While one power face faces the front, The back face of another side is facing the water. The simple understanding is that in low brace support, the back face of the paddle keeps you out of water, while in the high brace support, the power face keeps you out of the water.
When you are about to capsize, imaging the water as a table. Use the "table" as a support to push yourself upright. This is crucial for the kayak to swimmer rescue which will be covered later.
When you are about to capsize, imaging the water as a table. Use the "table" as a support to push yourself upright. This is crucial for the kayak to swimmer rescue which will be covered later.
Low brace turn
The low brace turn allows a kayaker to make a quick turn while on the move. It is similar to a normal turn while kayaking but remember to add the following steps:
1) While going straight, do a sweep to turn (no change from 1 star sweep method)
2) lean your kayak and body to the direction of turn while immediately going in to the low brace position
3) If you are about to capsize, use the low brace support to push yourself up, otherwise just make the turn and continue.
High brace recovery
The high brace recovery is similar to the low brace recovery, except that it is used when the kayak is really getting in to the water. Think of the kayak leaning until your elbow gets in to the water. The position to be in will be your arms comfortably closed to your body, and your hands at your chin level.
Edging vs Leaning
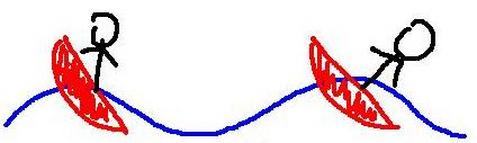
The picture below shows the difference between edging and leaning. Edging is as shown on the left, where the body of the kayaker is vertical to the true ground, while the kayak is on its side. Leaning is as shown on the right, where the body of the kayaker and kayak are both slanted from the true ground. One should learn to paddle and draw while in edging position.
Edge row, draw etc...
This really refers to what have been learnt before, with the addition you are doing in in the edging position. It will be tough at the beginning because your muscle set is just not trained for this but after sometime, it gets easier. :)
A simple note: When drawing with edge, the draw is done on the higher side of the kayak. this is so that the kayaker's body can counter balance the stablility.
A simple note: When drawing with edge, the draw is done on the higher side of the kayak. this is so that the kayaker's body can counter balance the stablility.
Kayak to swimmer rescue
The kayak to swimmer rescues teaches you how to rescue your swimmer who may be stuck out at sea. Just think of a day out kayaking when then storms and winds become terribly strong capsizing your friend and washing his kayak far off. Too far for him to reach for. His life is more important than a kayak. You need to find a way to bring him 4km back to land.
There are two ways to rescue a swimmer.
1) Kayak to swimmer bow rescue
2) kayak to swimmer stern rescue
Kayak to swimmer BOW RESCUE
You see a swimmer out at sea screaming for help, paddle up to him and shout out to him asking if he is alright. (Remember, never rescue a person who is panicky, he'd probably capsize you!) After knowing your swimmer is not panicky, paddle up closer to him and ask him to hug your bow as one would when waiting for you to rescue them from their capsized kayak.
Once they are in a comfortable position, paddle back to shore and let them off.
Kayak to swimmer STERN RESCUE
Similar to the kayak to swimmer bow rescue but this time, the swimmer climbs up face down towards the stern of the kayak, and clings on the back of the kayak, holding on either to the coaming of the kayak or the kayaker. It is recommended to cling on to the kayaker instead of the coaming. This is so that in the case the swimmer gets unconscious and falls off the kayak the kayaker will immediately be able to notice it and return to save the unconscious swimmer.
Bow Rudder
What happens when you are moving straight, and need a quick way to make a turn? Well you use the low brace turn... but the low brace turn has the danger of capsizing... and that is a huge problem. The answer to a quick turn which is very much less risky in terms of capsize compared to the low brace turn, is using the bow rudder!
In simple understanding, to turn left, face the paddle out infront of you, with the paddle on your left pointing in the NNW of the kayak. Turn the power face of the front paddle towards the kayak. In that position, put the paddle in to the water and the kayak will steer towards the left.
**KEY NOTE: when submerging the paddle in to the water, the hand furthest from the paddle in the water should be positioned at the forehead, while the arm closest to the paddle in the water should be straightened out. Align the arm such that if the water initial is stronger than your arm strength, your arm will bend back and rest on your stomach area. This is to prevent any breaking of arm in the event of strong currents.
Stern Rudder
The stern rudder is an add-on from the 1 star stern rudder. In level 1 stern rudder, you put the paddle in to the water in the direction you want the kayak to turn to. In the 2 star stern rudder,you put the paddle in the same way, but as the kayak moves on, you rotate the paddle like spreading butter near the stern of the kayak. This allows the kayak to move not just left, but also right while moving.